

Free Multiplication Chart Printable PDF
Are you looking for a free multiplication chart printable to use as a practice aide for learning your times tables? If so, this post shares some helpful information on how you can use a blank multiplication table to learn your multiplication and times tables facts quickly and efficiently. You can also download a free printable 12x12 multiplication table chart that you fill in on your own.
Before you get started, it’s important that you understand some key information relating to multiplication charts and times tables. Let’s quickly focus on answering three key questions (understanding the answers to these questions make learning your multiplication chart facts much easier and will save you lots of time in the long run).
How do you read a multiplication chart? How do you read a multiplication table?
Why does the order of the terms not matter in multiplication?
What should you always be looking for when filling in a blank multiplication chart?
(Do you want more free math resources and activities in your inbox every week? Click here to sign up for our free mailing list)
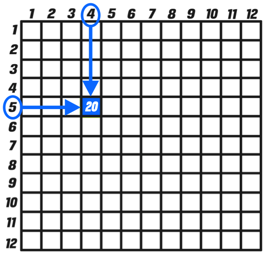
How do you read a multiplication chart? How do you read a multiplication table?
Multiplication charts and multiplication tables work like a Bingo board, where the number inside of each box represents the product of the corresponding column and row.
For example, 4 x 5 = 20
Now that you understand how multiplication tables work, you can fill in each box with the number that is equal to the product of the corresponding column and row.
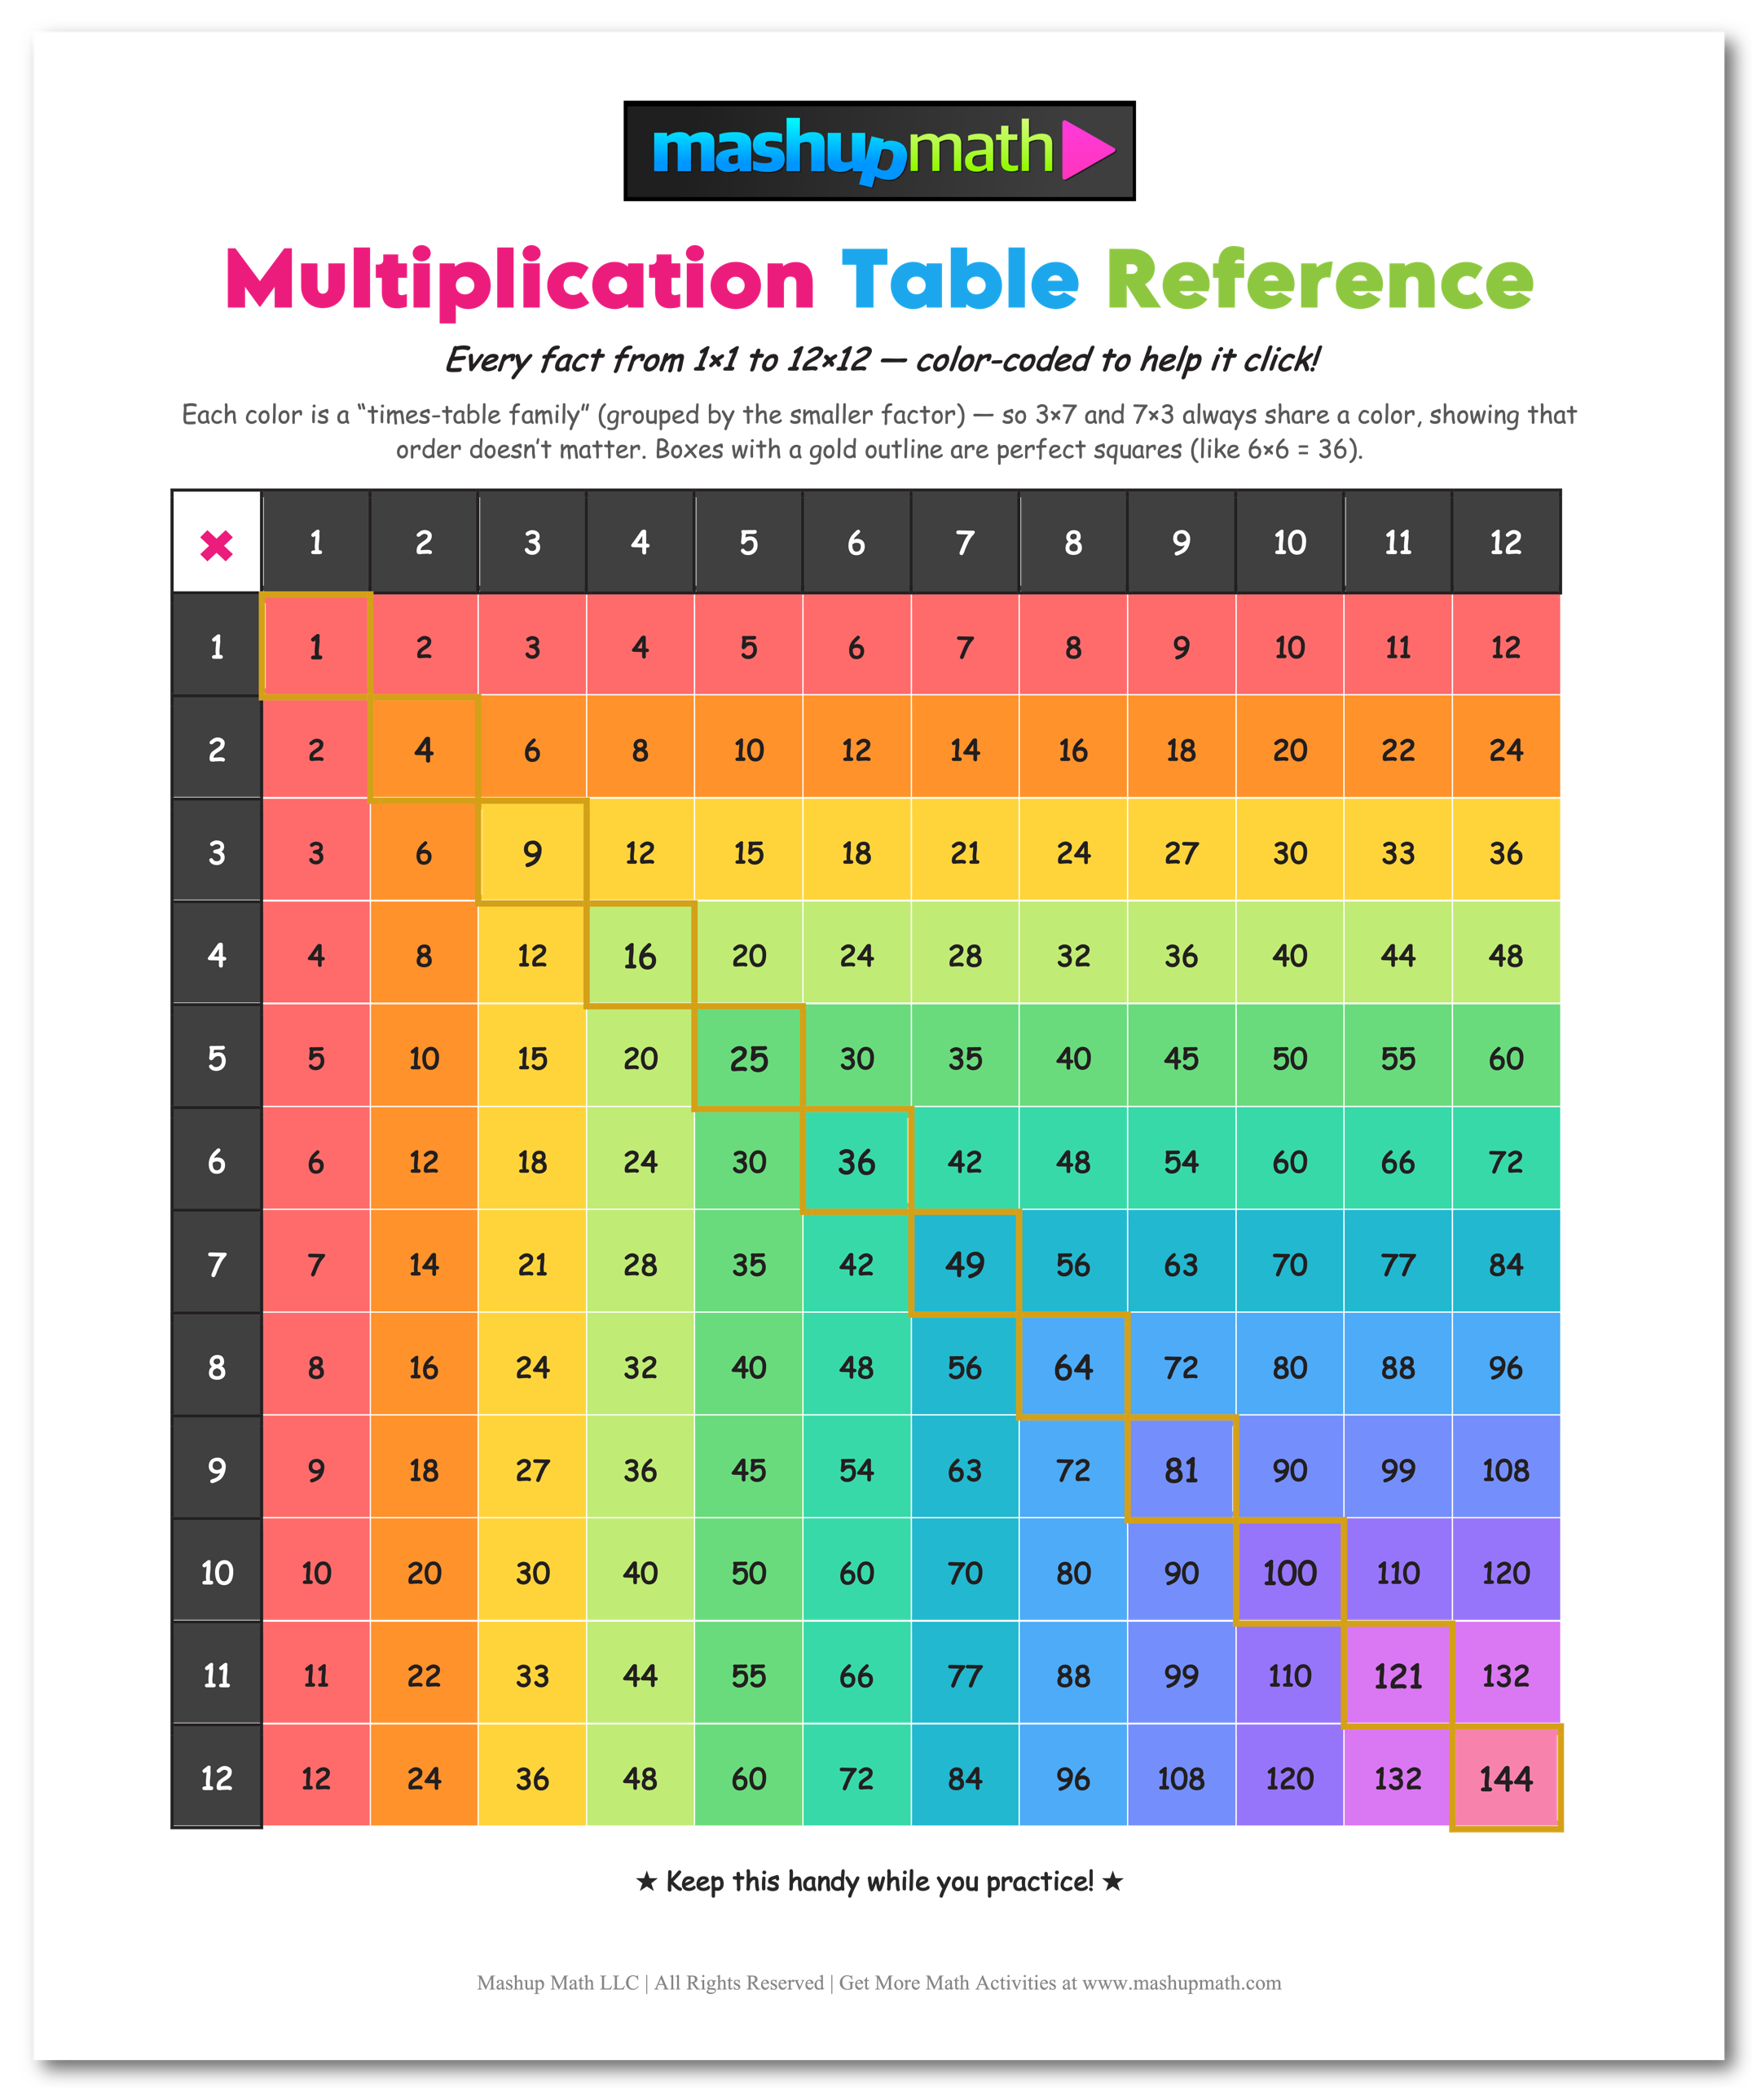
Why does the order of the terms not matter in multiplication?
Since multiplication is commutative, the order of the terms does not matter.
For example, 3 x 7 = 21 AND 7 x 3 = 21
Notice that, even when the order of the terms is reversed (3 x 7 or 7 x 3), the outcome is the same since they both equal 21. This fact is always true when multiplying integers together.
Now that you understand that multiplication is commutative, you will have a much easier time completing your printable multiplication chart.

What should you always be looking for when filling in a blank multiplication chart?
Whenever you are filling in a multiplication table or multiplication chart, you should always be looking for patterns!
For example, take a closer look at the 5 times table and see if you notice any patterns…

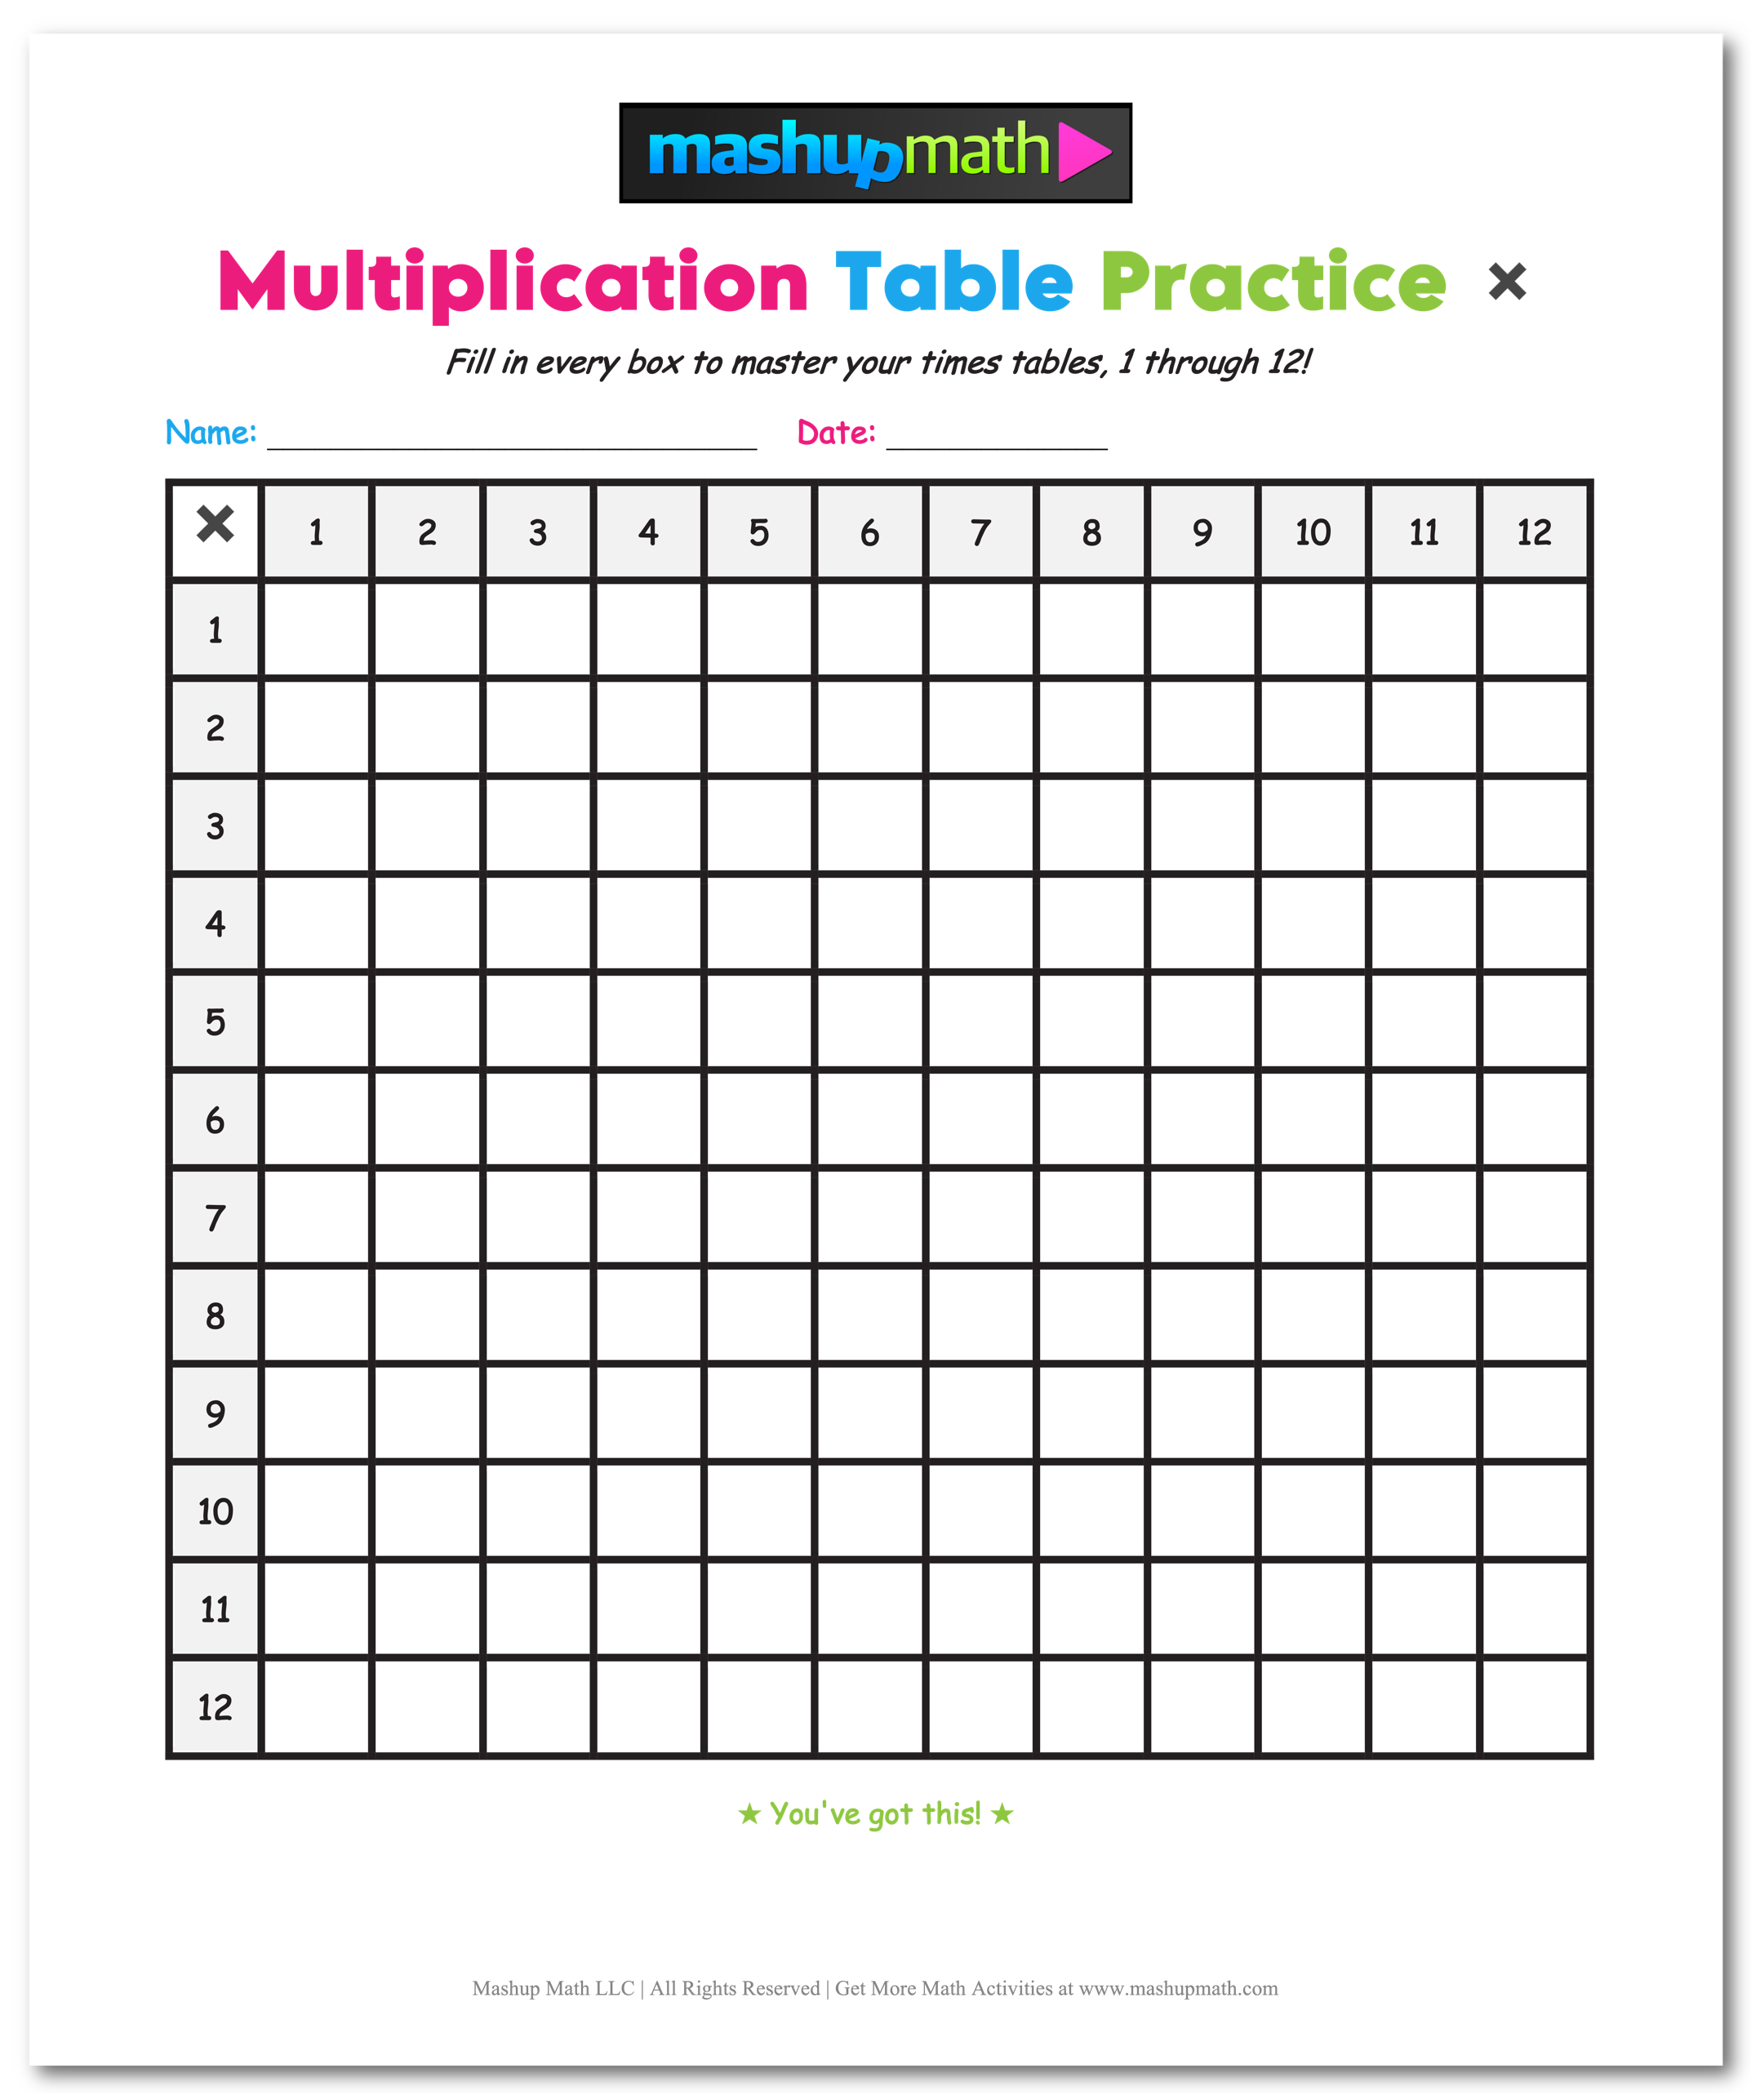
Download: Free Multiplication Chart Printable
Now that you know how to read a multiplication chart, why the order doesn’t matter when multiplying terms, and why you should always look for patterns, you are ready to download your free multiplication chart that you can print and use as a reference guide and as a practice tool.
Note that the following times table charts are 12x12, which means that they only include times tables from the numbers one to twelve in numerical order.
To download your free printable multiplication chart as pdf file, simply click one of the two links below to download and save the file. You have the option to download a blank multiplication chart that you can fill in yourself or a completed multiplication chart that you can print and use as a quick reference whenever you need help with multiplying numbers.
▶ Click here to download your free BLANK MULTIPLICATION CHART (PRINTABLE)
▶ Click here to download your free COMPLETED MULTIPLICATION CHART (PRINTABLE)
Looking for more help with practicing your times tables?
Click the link below to watch our corresponding video lesson on how to complete a 12x12 multiplication chart for a closer look at how to learn your times tables. The video is the perfect companion for sitting down and filling out your blank multiplication table until you are eventually able to fill it out completely on your own. After all, practice makes perfect! (We highly recommend printing out multiple copies of our blank multiplication table chart and filling them out until you no longer need a guide).
Conclusion:
Completing a blank multiplication table and using a filled-in multiplication chart as a reference is a great way to learn your times tables and your multiplication facts. We recommend printing out several copies of our blank chart and filling them out using our video lesson as a guide until you can fill out the entire table on your own. Then, you can use our filled-out reference table to help you while you work on problems.
Lastly, always keep these three ideas in mind whenever you are studying and/or learning your multiplication facts: (1) a multiplication table works like a bingo board where the number in each box represents the product of the corresponding row and column, (2) multiplication is commutative, which means that the order of the terms does not matter (example: 2x8=16 and 8x2=16), and (3) always look for patterns and relationships between the numbers (this will help you to always remember your multiplication facts!).
More Resources You Will Love:


